First time setup
There is some basic set up required for Simple Job Control to allow it to work seamlessly with your business. You don’t need to do this all at once, just reading the Basics section will be enough to get you up and working.
Here is what is covered on this page:
Basics
This set up is common to everything that you can do in Simple Job Control. In this section you will:
- Set up the ticket screen to suit your business
- Put in your organisation settings to allow you to make quotes, invoices and purchase orders with your business details
1. Log in and go to the settings page
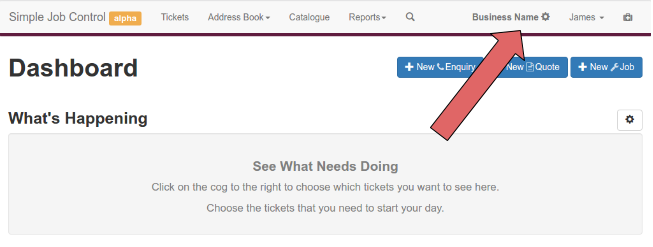
The location of the settings page
- Ensure you are logged in to your account.
- Go to the settings page by clicking on your the cog in the top right of the screen.
Note that on the settings page any settings above the green save button will not save unless you hit the save button.
2. Set Organisation Settings
Now that you are on the settings page click “Organisation settings” to expand that section.
The information that you enter in the organisation settings section will be used on documents
generated by the system.
Fill in relevant information into the fields then click “Save”.
Note: In the Organisation Settings section, Payment Details are for only for display on invoices that you create, they are not for billing purposes.
3. Set Ticket Settings (optional)
This section starts with sensible default settings, but you will probably want to change it at some point. Ticket settings control the format of the ticket numbers, the statuses available on the ticket screen, and allows you to add custom fields to the ticket screen.
See the Ticket Settings page if you would like modify these settings.
Emailing from within Simple Job Control
You can email quotes, invoices, purchase order and attached files from within Simple Job Control. In order for people to be able to reply you must set the return address and sender in the Communications Settings section.